I went to lunch with a neighbor friend and her daughter a few weeks ago. The waitress served the three year old a full sized portion of lemonade in a not-so-kid-friendly cup (no straw, no lid, 20 something ounces… you get the idea). Upon the girl’s first drink, the cup slid from her tiny little hands and tipped over on the table. She was covered in lemonade. And so was the table. And the wall. And the floor. Just everywhere. My friend was mortified, and I felt terrible for her. Maybe even more so for the little girl who had to sit through lunch in a wet dress.
The accident really got me thinking about being prepared, as a parent, for when something like that happens. Do you keep extra clothes in your car for your kids, just in case? What if they throw up in the car? What if they have diarrhea that comes out the side of their diaper while you are on a road trip? Been there, done that. What do you do with the messy clothes or seat cover once an accident has happened?
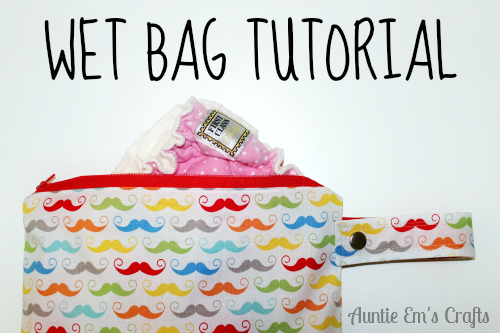
The daughter inspired me to make a wet bag for her mom to keep in the car. She can keep a change of clothes inside the bag and store it in the truck *just in case*. I ran the wet bag idea past another friend Vanessa, who is a great customer of mine. She informed me that as a cloth diaper parent, she uses wet bags to store the soiled diapers. She also has smaller wet bags that she uses as snack baggies, and a large wet bag for her diaper pail. Brilliant! I wondered where this great idea was six years ago when my only child was leaking in his car seat on our trips from Oklahoma to Illinois. Putting his seat pad into a plastic grocery bag certainly did not help contain any smells for our long drive, I can tell you that. Yuck!
Using Vanessa’s advice, I have made several sizes of wet bags. The finished sizes are as follows:
Snack size: 6.75×6.75” I used my SIL’s tutorial on Simply Notable for this size. I’ve got about a dozen made so far and LOVE them!
Diaper size: 11×12”
XL: 12×18”
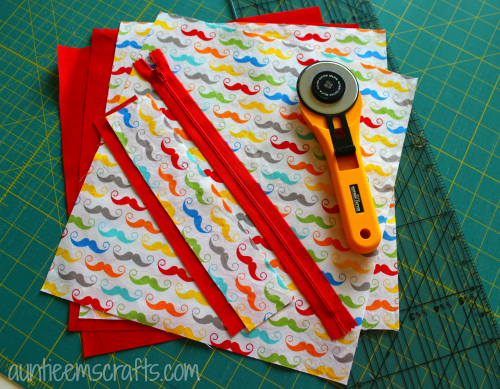
I used a cotton woven fabric for the outside and laminated cotton for the liner. I cut the fabric pieces for the other two sized bags as follows:
Diaper size: Cut two outside and two inside pieces at 11.5×12.5”. You will use a 12” zipper for closure. Cut a piece from both fabrics 2×10″ for the strap.
XL Bag: Cut two outside and two inside pieces at 12.5×18.5” each. You will use a 14” zipper for closure. Cut a piece from both fabrics 2×10″ for the strap.
I will show you how to make the diaper sized bag, but the directions will be the same for the XL bag.
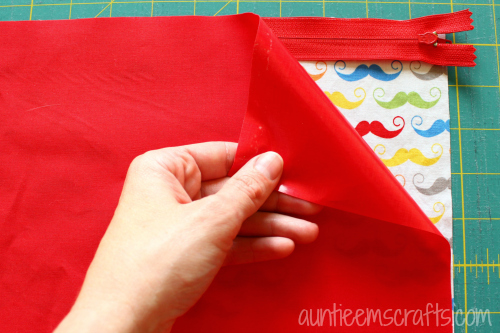
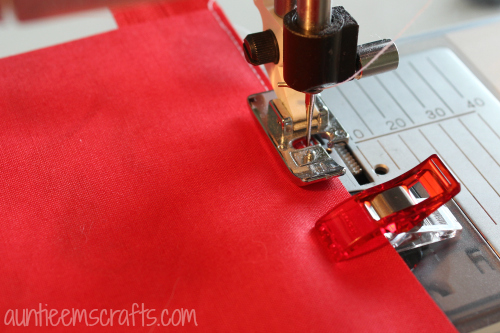
Take one outside piece and lay it right side up. Lay the zipper face down along the top edge. Then place the laminate face down, lining it up on all sides. I use Clover Wonder Clips to hold the layers in place because the laminate likes to move around.
I have tried both ways, but I prefer to sew with the laminate side up. It seems to prevent the cotton from stretching out as much. Straight stitch along the edge to join the three pieces using your overcast edging presser foot. I set my needle a few clicks to the left a little to make sure the thread catches on all three pieces (-.8 or -1.0).
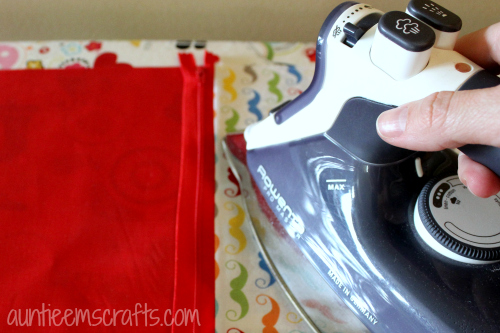
Open the layers and lightly press near the zipper to flatten it out. Be careful not to iron directly on top of your laminate or it will stick to your iron 🙂
Repeat the previous steps with the other pieces to attach them to the other side of the zipper.
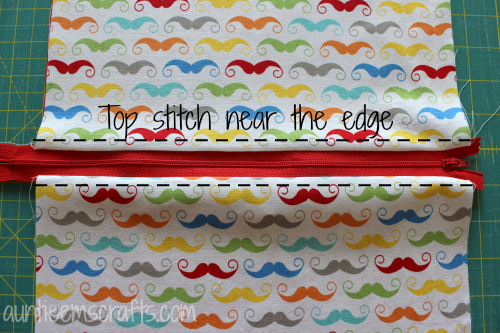
Top stitch along both sides about 1/4″ from the zipper. This step prevents the laminate from getting stuck in the zipper later on… and it looks nice too.
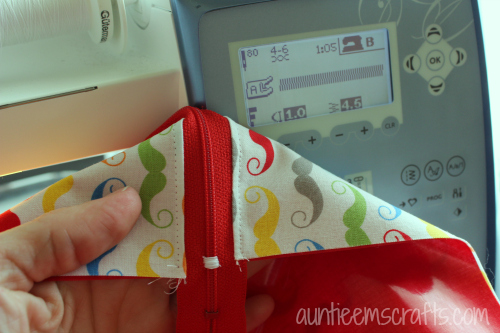
Using a foot for your decorative stitches, set your machine to zig zag stitch. Change the settings so that it is a wide stitch that is close together. On my Sapphire, it looks like this.
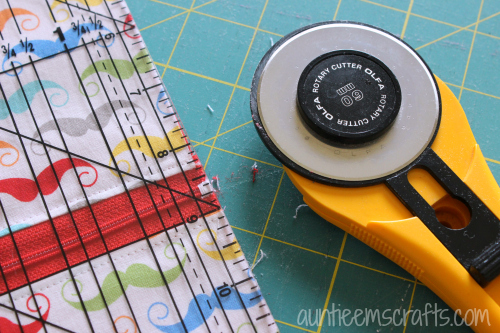
Take the bag to your cutting mat and trim up the long edges if your material shifted. Cut off the excess parts of the zipper.
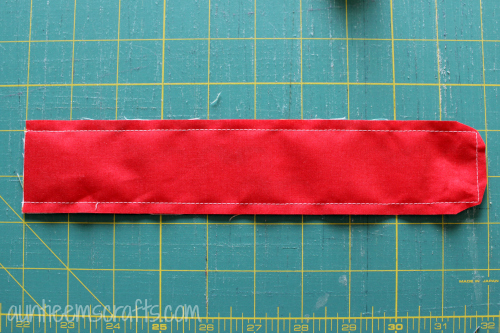
Create your wristlet strap by placing the 2×10″ outside and inside fabrics right sides together. Sew 1/4″ around two long sides and one short side. Fix the stitch (or back stitch) where you begin and end. Clip the fabric away from the excess fabric from the corners, but be careful not to cut your stitches.
Using a pencil or other pointy object, flip the strap right side out. Top stitch as desired. I like to do 1/4″ away from each edge. I changed my thread to match my laminated liner and left my bobbin white. Leaving it white would have been fine too.
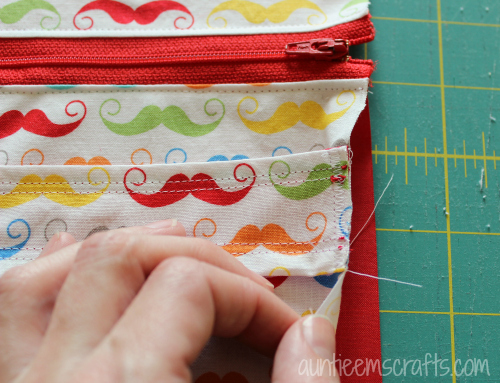
Place the strap onto on of the outer pieces of fabric, approx 1″ below the zipper. Use a Wonder Clip to hold the strap on the front while you carry it to your machine. Be sure to move the liner out of the way before sewing. Stitch a tight zig zag close to the edge.
Open the zipper at least half way. Did you catch that? OPEN THE ZIPPER AT LEAST HALF WAY!! (You don’t want to try opening your pouch after it has been sewn together, it takes FOREVER!).
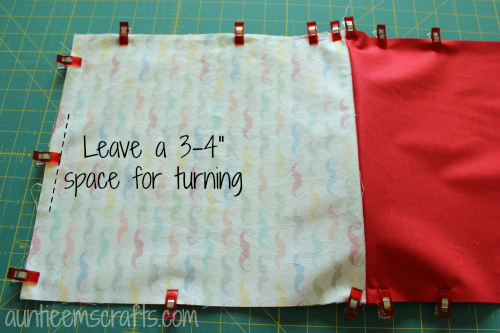
Place your project so the outside pieces are facing together and the liners are facing together. Secure the project with the Wonder Clips. Using your ¼” foot, straight stitch all around, but leave a space to turn (approx 3-4″) on the outside piece. Be sure to fix the stitch or back stitch when you begin and end.
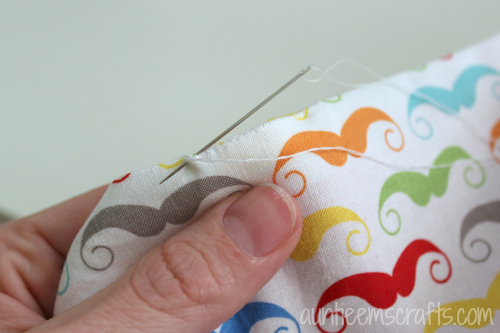
Clip the excess fabric from around the four corners so that it gives a nice finish when it is flipped right side out. Again, be very careful not to clip the stitches! Flip the bag right side out and push the lining inside. Hand stitch the space closed.
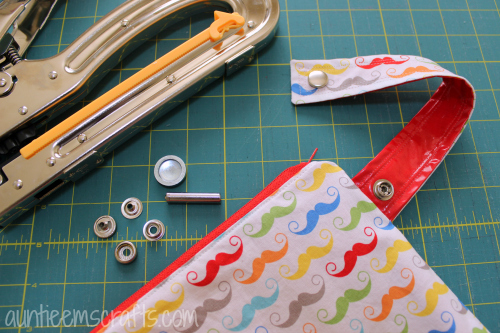
Add a metal snap, plastic snap, or Velcro to the wristlet. I used a plastic snap for my personal bag simply because that is what I had on hand at the time. I think the metal will hold out longer so I’m using them on bags for my Etsy store. To install the metal snaps, I first used my Crop-A-Dile-II to create the holes. The snaps I bought included a metal pieces for installing the snap. A few hits with a hammer did the trick.
It does take some time to make one of these (plan on at least an hour), but the end result is worth it. I’m planning on keep some extras on hand so that I can stuff it with bibs, a diaper strap, and burp cloths for baby shower gift. Of course, I’ll be taking one down to my neighbor soon too 😉
How does this keep other things in your bag dry after filling wet bag? No plastic liner, etc??? I am interested in making but want to make sure it is worthy of use. Did I miss something?
A wet bag is meant only for wet items for short periods. You could certainly make a second one to store an extra set of dry clothes.
It calls for a laminated fabric for the lining, that’s what makes it water proof and keeps everything else dry.
Laminated cotton is water proof – it’s the fabric used for the inside.
I will definitely be making some of these.
Can you tell me if this cotton laminate is suitable for scrunching as in a drawstring wet bag?
Thank you!!
I probably wouldn’t use laminated cotton for something like a drawstring bag. Maybe PUL would be a better option for that.
Thank-you for this easy to understand instructions. I have made 2 large ones for water aerobics and 2 medium ones for gifts. They are awesome!
I have made 4 wet bags so far but am confused about one of your instructions. After you say to topstitch next to zipper you say to change to zigzag stitch and change the width of the stitch. Where do you use that stitch? When you sew bag together? I am confused. Thanks
Hi, she used that stitch to sew on the wristlet x
@Robbyn Bray, I think it is for “shortening” the zipper (see the same picture and you’d notice the white “band” on the red zipper)